
Ingredients:
•1 box cake mix (cook as directed on box for 13 X 9 cake)
•1 can of frosting (16 oz.)
•Wax paper
•Candy melts (1 lb. pkg.)
•Lollipop sticks
Styrofoam Bricks (or something to stand the cake pops in to dry)
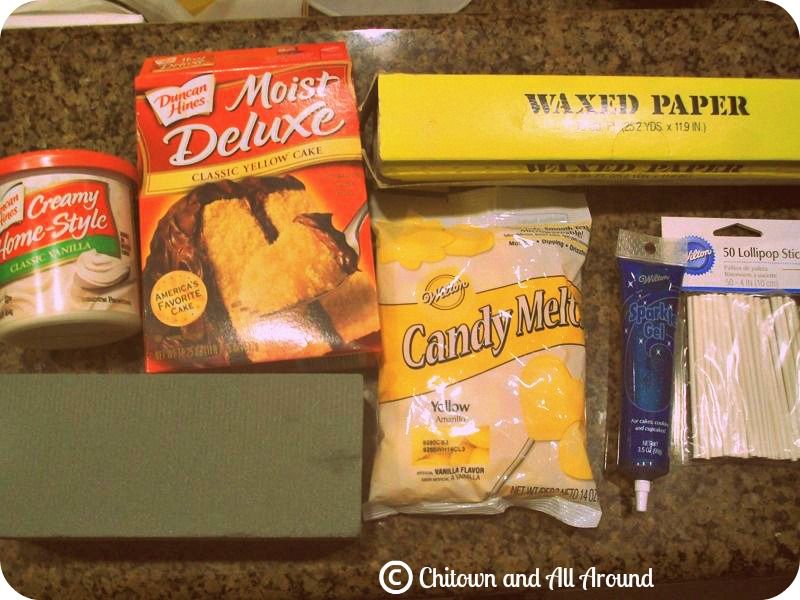
I personally like Duncan Hines cake because the cake is a moist consistency. I've used Pillsbury Strawberry and Funfetti flavor but those tend to be more sweeter.
Directions:
1. After the cake is cooked
and cooled completely, crumble it into large bowl.
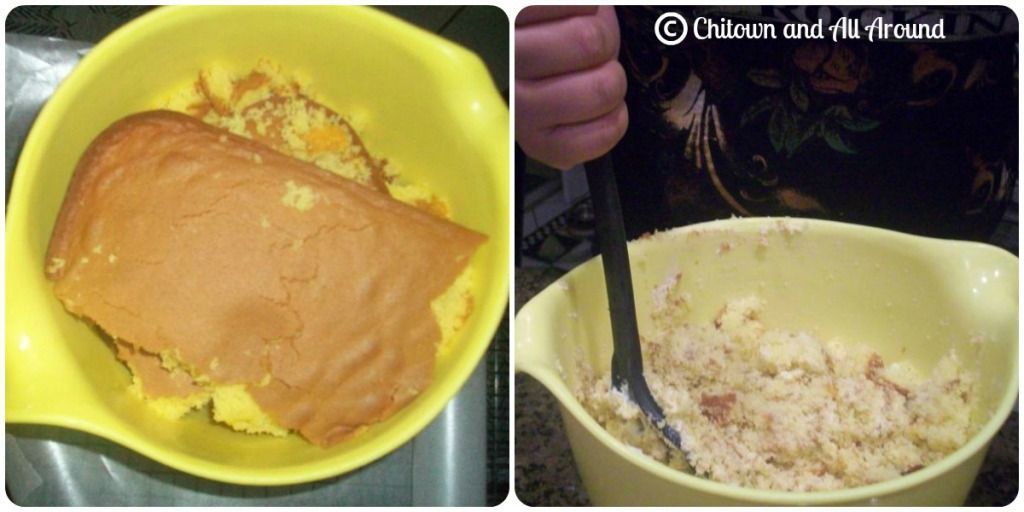
2. Mix cake thoroughly with 1/2 a can of frosting. The consistency should be sticky enough to shape the mixture into balls. If it isn't sticking well add more frosting. TIP: For yellow cake I add 3/4 can of icing sometimes, but beware of adding that much to other flavors such as chocolate and strawberry because the cake is naturally very moist and it will make the cake pop sweeter with too much icing.

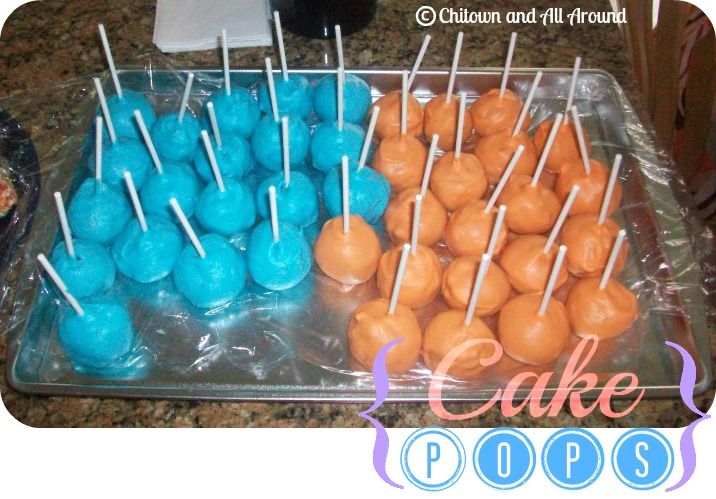
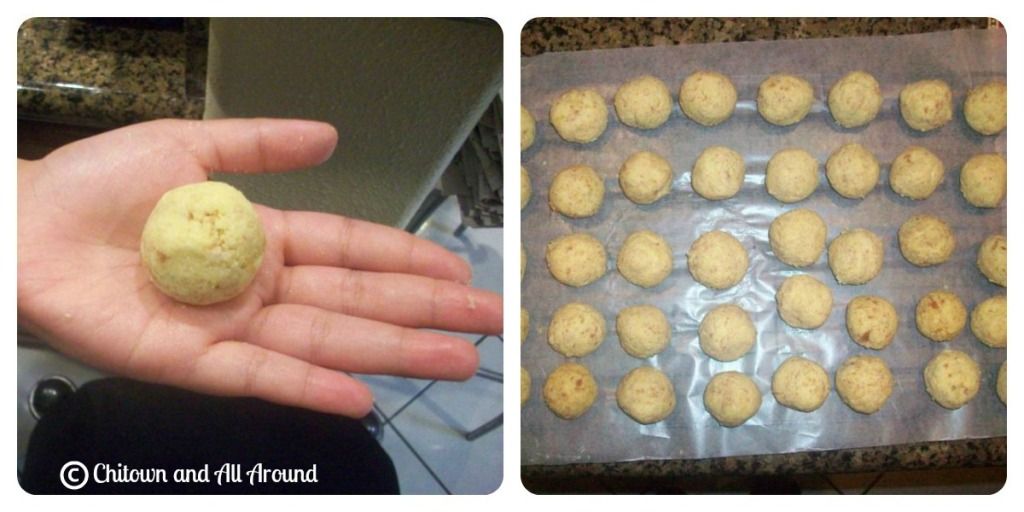
3. Roll mixture into
quarter or half dollar size balls (depending how big you want it) and place on a wax paper covered cookie sheet.
4. Melt about 5-7 chocolate pieces in the microwave per directions on package.
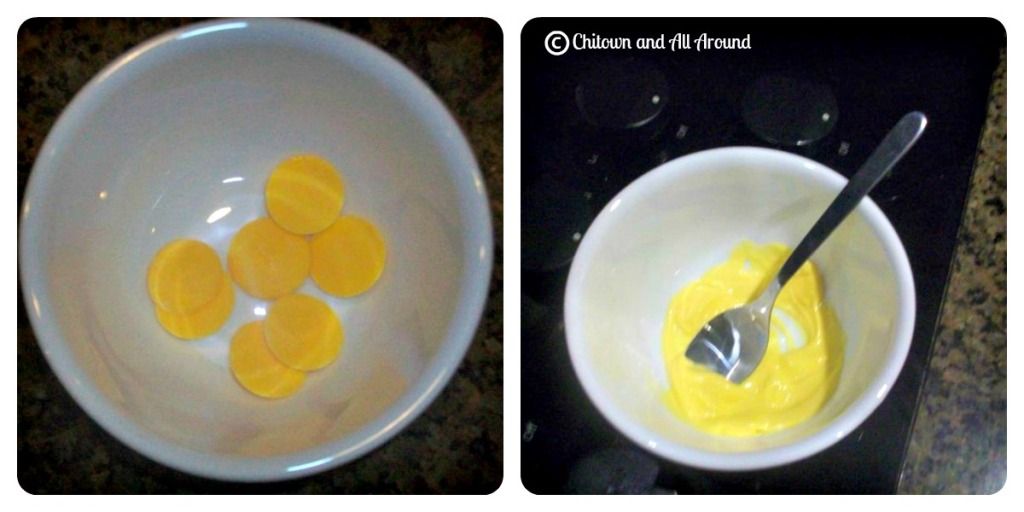
5. Dip the tip of your lollipop stick in a little of the melted
candy coating and insert into the cake balls about halfway.
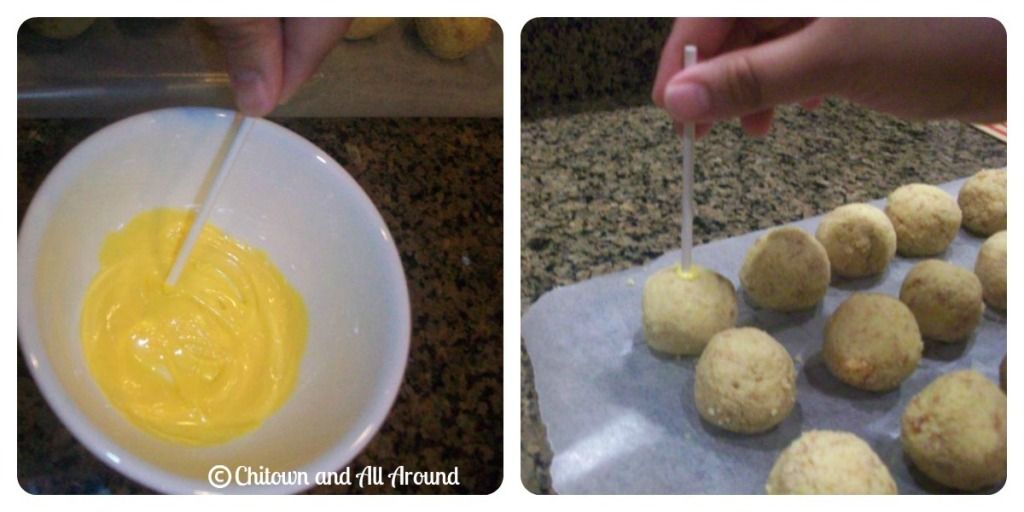
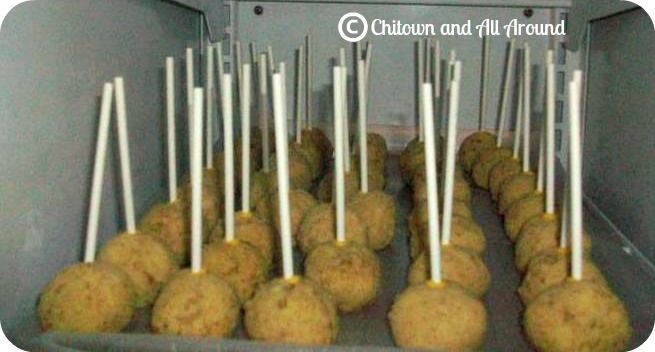
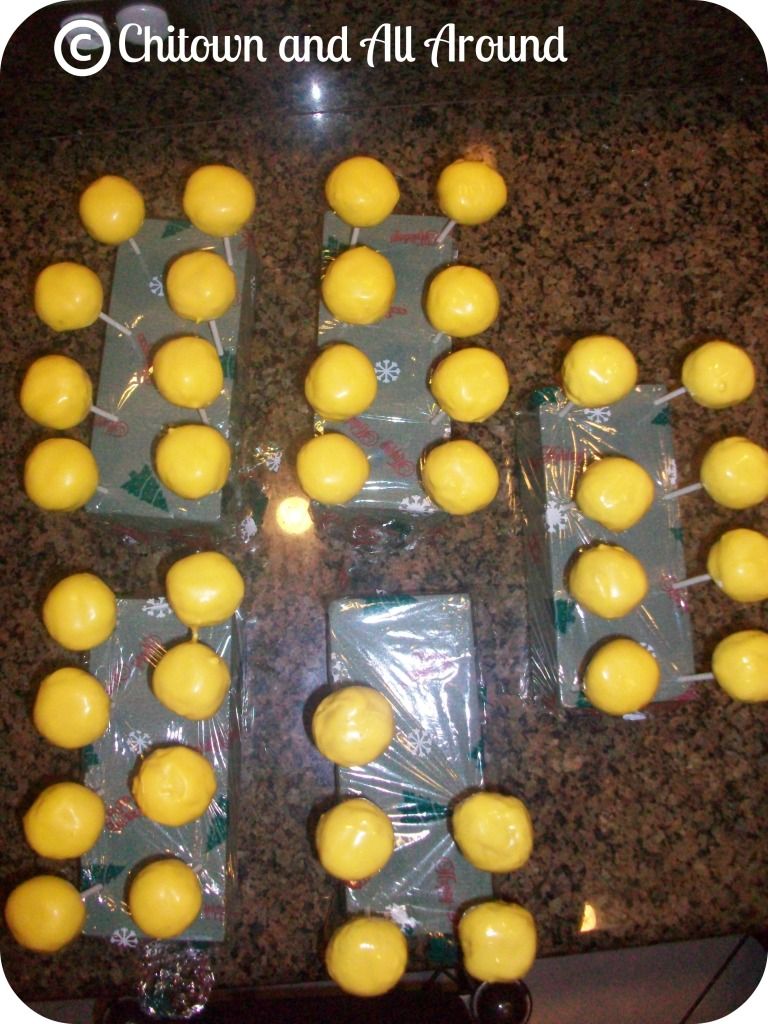
6. Place them in the freezer for about 15 minutes.
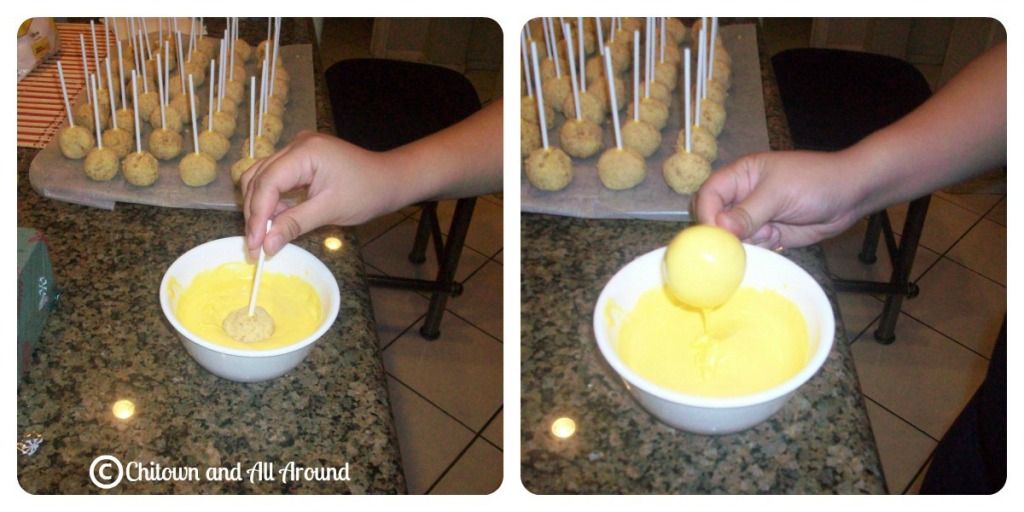
7. Carefully insert the cake ball into the candy coating and
softly tap and rotate the cake pop against the edge of the bowl until the excess chocolate falls off. TIP: Don't tap too hard or else the cake ball will fall off the stick! It's all in the wrist ;)
8. Place in a Styrofoam block to dry. If you see cracking in the candy melt as it dries it's usually because you froze it for too long and the confliction with the frozen cake pops and the hot candy melt is causing it to crack. Usually if that happens I just decorate the cake pop to cover it up hehe. TIP: cover the Styrofoam blocks with cling wrap to protect it from the the dripping excess chocolate.
9. Enjoy!

Most of the ingredients can be found at Walmart, but I bought the Styrofoam bricks, candy melt, and lollipop sticks at Michael's. Michael's usually has a better selection in candy melt colors. TIP: all the candy melt is white chocolate except the brown one, which is milk or dark chocolate. I know some people don't like white chocolate so I wanted to give you a heads up.

Take a picture of your creation and let me know how it turned out!!

Love this! I am going to try and make some for Halloween...nothing fancy, just Halloween colors :)
ReplyDeleteI've never see black candy melt but you can always dip them in orange and decorate it with black gel or icing
DeleteI was even thinking white with orange and black stripes, or black and orange sprinkles, etc.
Deletethat sounds cute. fyi i tried to put sprikles on my xmas cake pops once and it made it ridiculously sweet, but I also used those really grainy sugar looking ones
Deleteyes...i love making them too, super easy and very yummy! (love the step by step pics, im much more of a visual learner!)
ReplyDeletehave you ever tried to make any other shapes or designs? what's your favorite flavor to make?
Deleteive made chocolate, carrot cake and my fav was german chocolate! i havent made anything but the balls!
DeleteDo you have any problem with the candy melt in the microwave? Ive seen in some blogs that they heat the container in boiling water. How long do you have before the candy melt hardens?
ReplyDeleteI've never had any problems with warming my candy melt in the microwave as long as you follow the directions. It says to head it for 1 min. stirring halfway through (30 sec.). I've forgotten about it a couple times and ended up burning the chocolate and there's no return from that. I'd say the only one I have had problems with for unknown reasons is the white-colored chocolate. It never liquifies for me. I've never tried any other methods but plan to upgrade to maybe a chocolate melting pot in the future just to make the dipping process easier. I don't have an exact time frame of how long it lasts until it starts hardening, but I add enough candy melt to fill my bowl (deep is better than wide) and it never hardens up. I take my tip to tap off the excess candy melt too.
Deletethank you, I wish I had read this before I bought the candy melts... I bought white :( I am going to try today!! :)
ReplyDeleteoh boo! haha. maybe it'll work better for u than it did for me! good luck and let me know how it turns out! post a pic or something on my facebook wall. I'd love to see it. if you have any questions im here to help!
Delete